Important: This article targets Microsoft Bot framework version 3; version 4 is now available and deprecates this article.
- The only bots that are supported are from Microsoft's Bot Framework, using the Direct Line connector.
- Bots created in this way can handle visitor chats, and transfer to another agent when required.
This article provides instructions to familiarize yourself with the Microsoft Azure Bot framework, and how to register Bots against your Live Assist for Microsoft Dynamics 365 account.
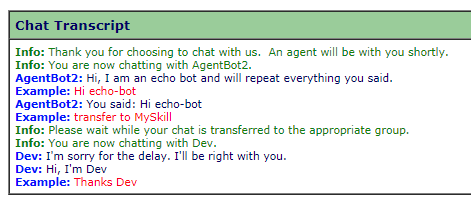
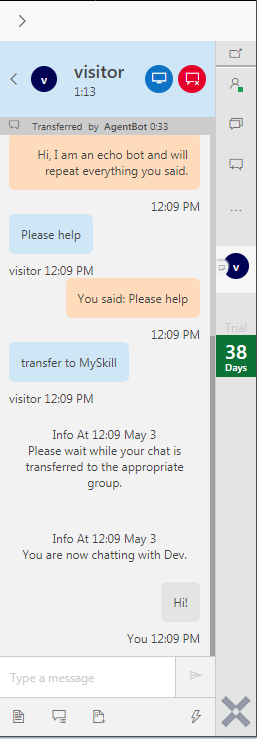
The bot shown here simply replies to any chat messages that the visitor to an engagement sends to the bot. The engagement is configured to target a specific skill group, to isolate the bot from other agents in your organization. When the visitor sends transfer to MySkill, the bot allows the chat to be transferred to another skill group with human agents assigned to it.
Requirements
To produce Bots as Agents you need the following:
- A Live Assist for Microsoft Dynamics 365 License.
Each bot can handle 3 concurrent chats for each Live Assist license allocated. - A Microsoft Azure Subscription, with access to the Azure Bot Service.
You can register for a free trial
Step 1—Creating a Function Bot
- Create a Function Bot resource in Azure.
- The Bot Name must be unique and you have selected C# Basic.
- Select an appropriate Pricing Tier for your bot—we use F0 for development, as it has little running costs.
- The significant parts of this process are:
- Selecting a name that is unique within Azure
- Selecting the C# (Basic) Application

This process may take Azure a few minutes to build.
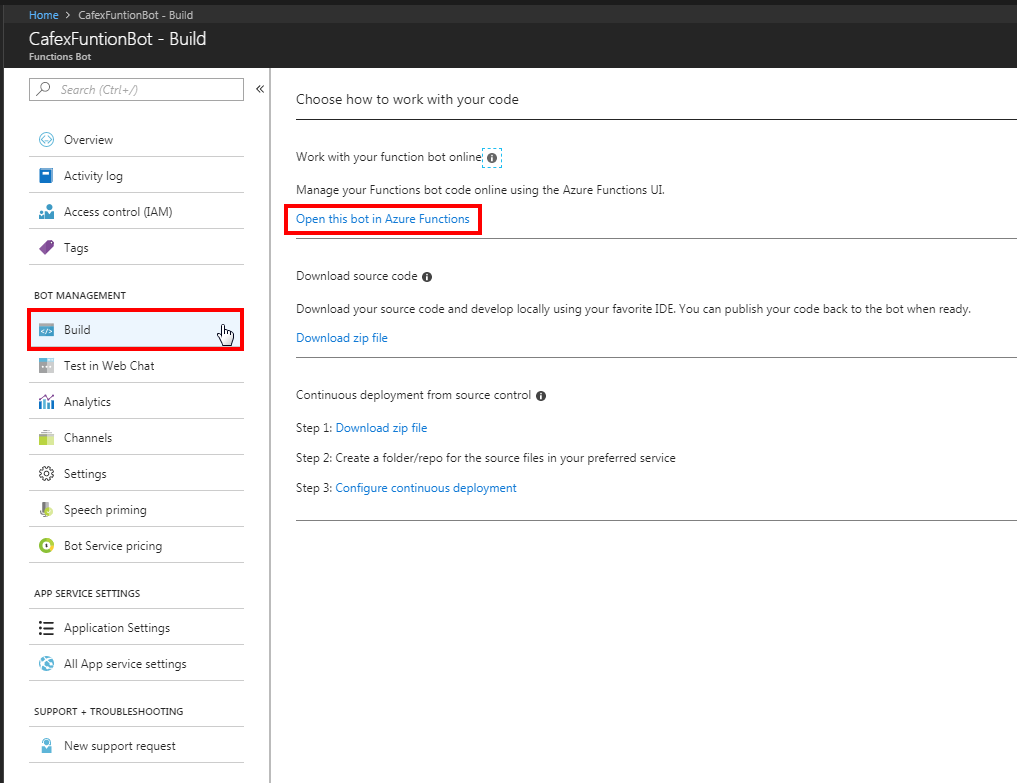
Step 2—Opening the Bot in Azure Functions
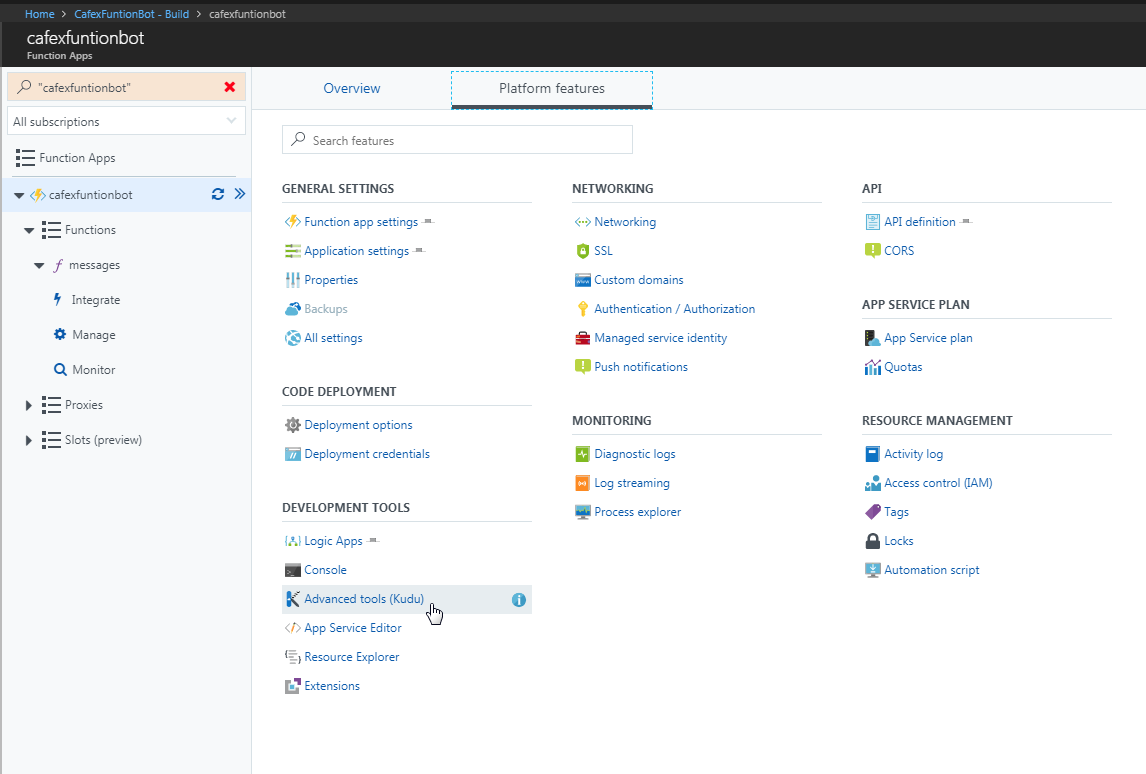
- When the Function Bot has been created, you can Build and Open the 'Azure Functions' to manage it.
Step 3—Applying the C# Code Changes
- Modify the EchoDialog.csx that comes with the Basic Function Bot.
- Make the following code changes:
- Include another package:
using Newtonsoft.Json;
- Define a static string within the class:
static string TRANSFER_MESSAGE = "transfer to ";
- Within the MessageReceivedAsync method, handle the communication between the visitor and the Bot:
if (message.ChannelId == "directline") { var laChannelData = message.GetChannelData<LiveAssistChannelData>(); switch (laChannelData.Type) { case "visitorContextData": //process context data if required. This is the first message received so say hello. await context.PostAsync("Hi, I am an echo bot and will repeat everything you said."); break; case "systemMessage": //react to system messages if required break; case "transferFailed": //react to transfer failures if required break; case "otherAgentMessage": //react to messages from a supervisor if required break; case "visitorMessage": // Check for transfer message if (message.Text.StartsWith(TRANSFER_MESSAGE)) { var reply = context.MakeMessage(); var transferTo = message.Text.Substring(TRANSFER_MESSAGE.Length); reply.ChannelData = new LiveAssistChannelData() { Type = "transfer", Skill = transferTo }; await context.PostAsync(reply); } else { await context.PostAsync("You said: " + message.Text); } break; default: await context.PostAsync("This is not a Live Assist message " + laChannelData.Type); break; } }else if (message.Text == "reset") { PromptDialog.Confirm( context, AfterResetAsync, "Are you sure you want to reset the count?", "Didn't get that!", promptStyle: PromptStyle.Auto); } else { await context.PostAsync($"{this.count++}: You said {message.Text}"); context.Wait(MessageReceivedAsync); } - Most of the Bot is left unchanged. The 'switch-statement' and the 'VisitorMessage' case provide most of the significant code.
Our bot simply relays the Message received back to the consumer unless they type: 'transfer to <agent name>'. This creates the LiveAssistChannelData object which is defined within the class:// Live Assist custom channel data. public class LiveAssistChannelData { [JsonProperty("type", NullValueHandling = NullValueHandling.Ignore)] public string Type { get; set; } [JsonProperty("skill", NullValueHandling = NullValueHandling.Ignore)] public string Skill { get; set; } }
The Channel Data is read by Live Assist, and in our case performs a transfer.
- Include another package:
See also:
- The Agent Enabler API documents provide a full list of Channel Data objects.
- A completed reference of EchoDialog.cs for this example is available in our Git Hub repository
Note: This code snippet is from the Web App Bot article, but the code is very similar, take caution when applying it, however.
Step 4—Creating a Direct Line Channel Connector
See: Creating a Direct Line Channel Connector
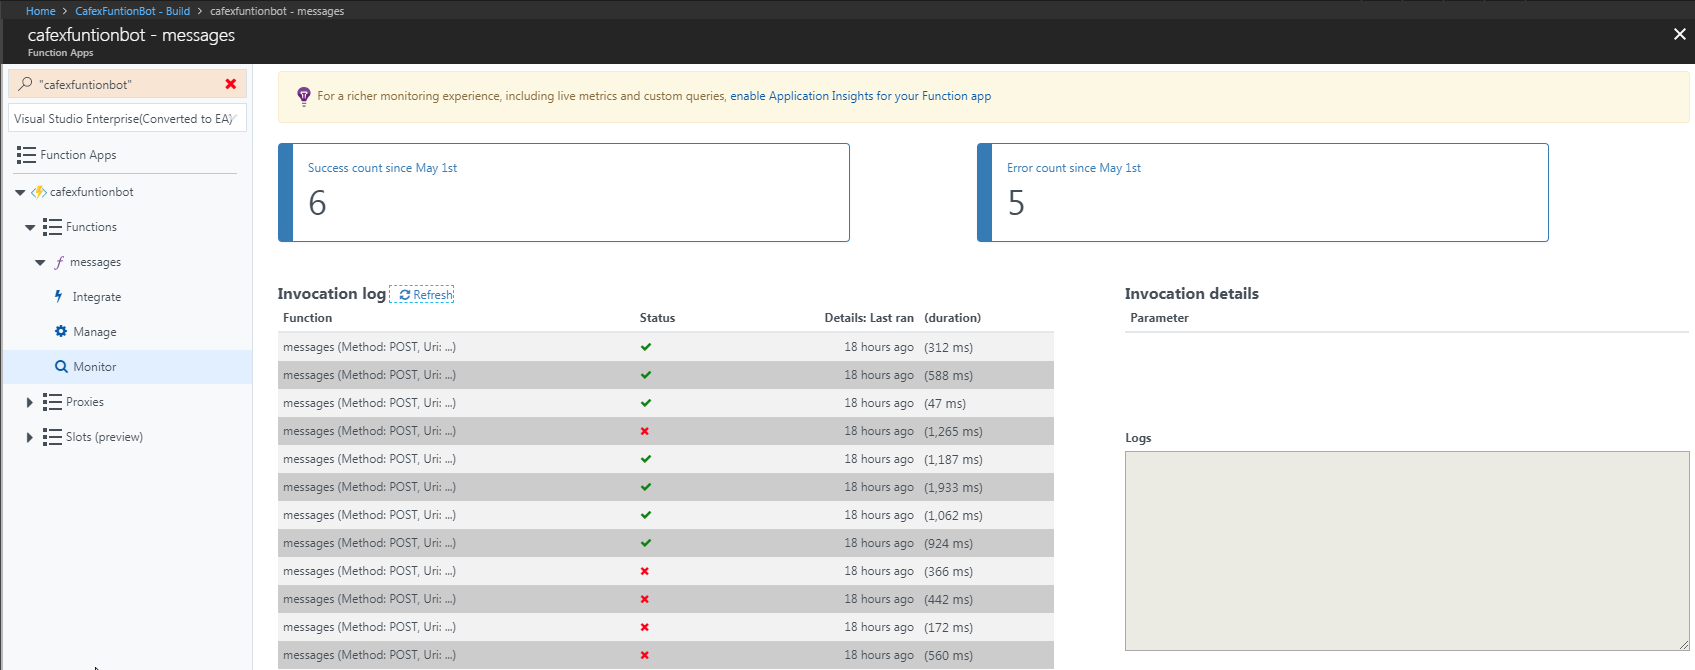
Step 5—Save and Run your bot
- Once the code is ready, you can Save and Run the bot. Compilation Errors are shown in the Error/Warning Log at the bottom of the screen. Also, Function Bots record invocation logs under the Monitor window. From here can get status of any messages sent to the bot:
Step 6—Configuring an Enagement
If you are developing bots on a production organization, be aware that the bot may answer any chats that are started, unless the User to allocated to a Skill Group within the Engagement Portal, then set up an engagement that routes to this skill.
- In the Engagement Portal, create a new Skill called BotSkill:
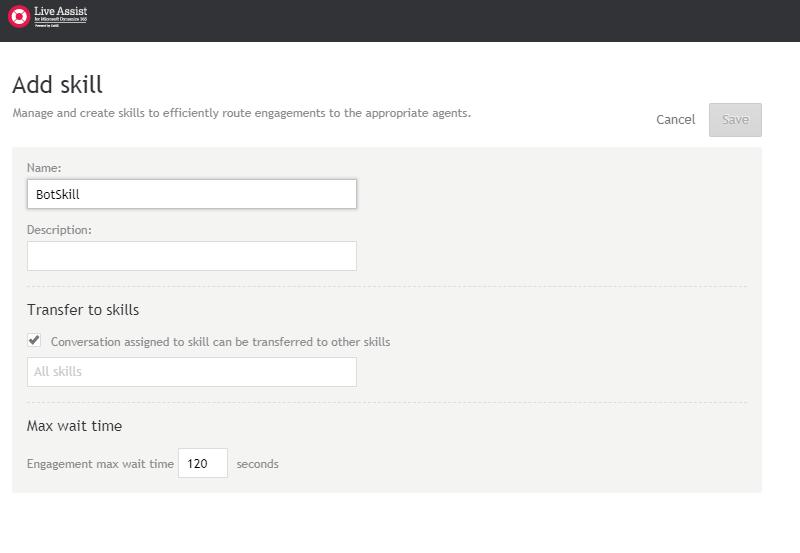
- Allocate the skill to the Bot User:
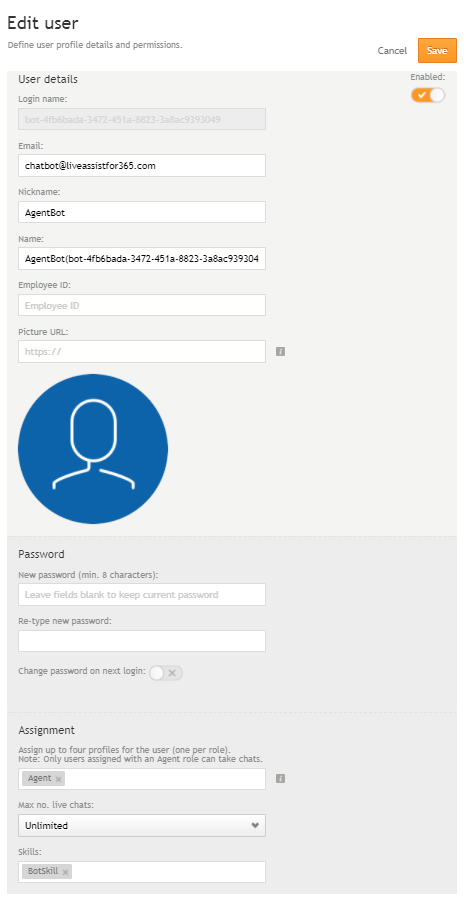
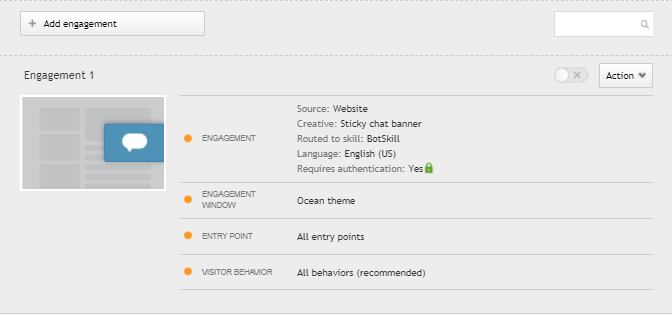
- Assign the BotSkill to the Engagement:
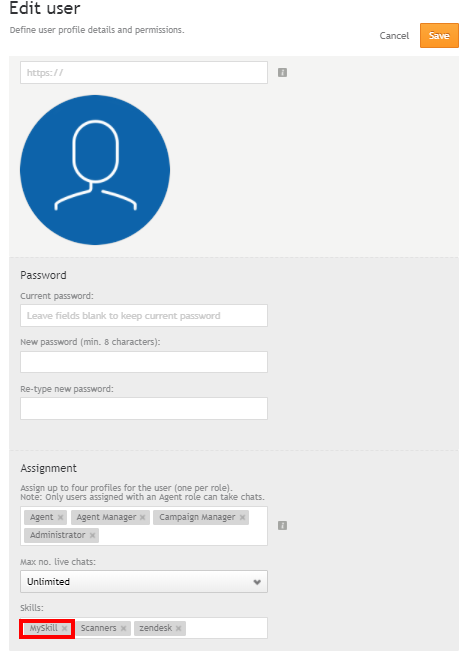
- In the same way, create a Skill Group MySkill and assign it to one of your human agents, to test the transfer.
Step 6—Testing your bot
- When you have published your bot, you can quickly test the new Chat Bot from Microsoft Azure > Test Web Chat tab.
Important: You need an Agent logged into LiveAssist for Microsoft Dynamics 365, under the correct skill group, to receive the escalated chat.
The bot should now be ready to test using a Live Assist for Microsoft Dynamics 365 engagement.
Note: It is possible to use the Trial Engagement.
- Visitor Side:
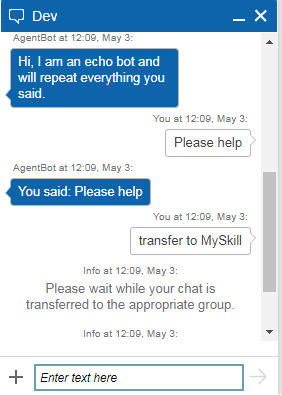
- When the User types: 'transfer to MySkill' the chat is routed through to the MySkill Group and the assigned Agent can answer it:
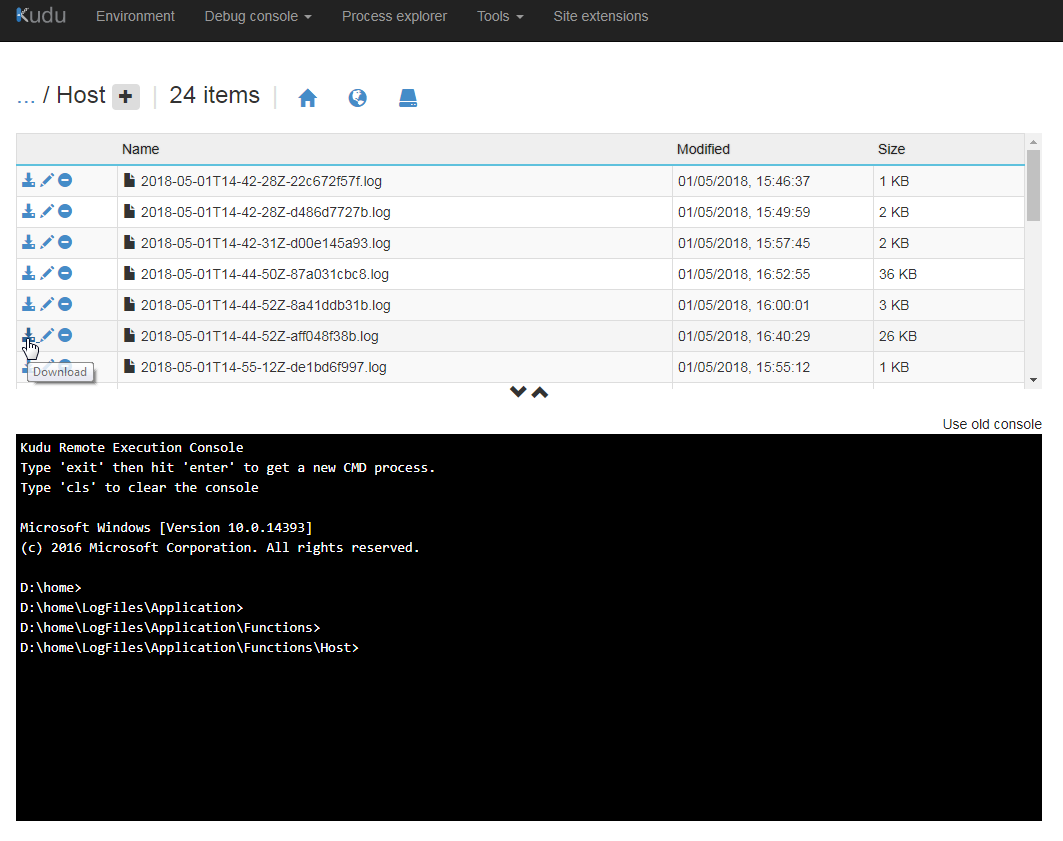
Step 7—Debugging your bot
There are numerous ways to debug your bot application. Bot logs can be retrieved through the Advanced Debugging options under Kudu:
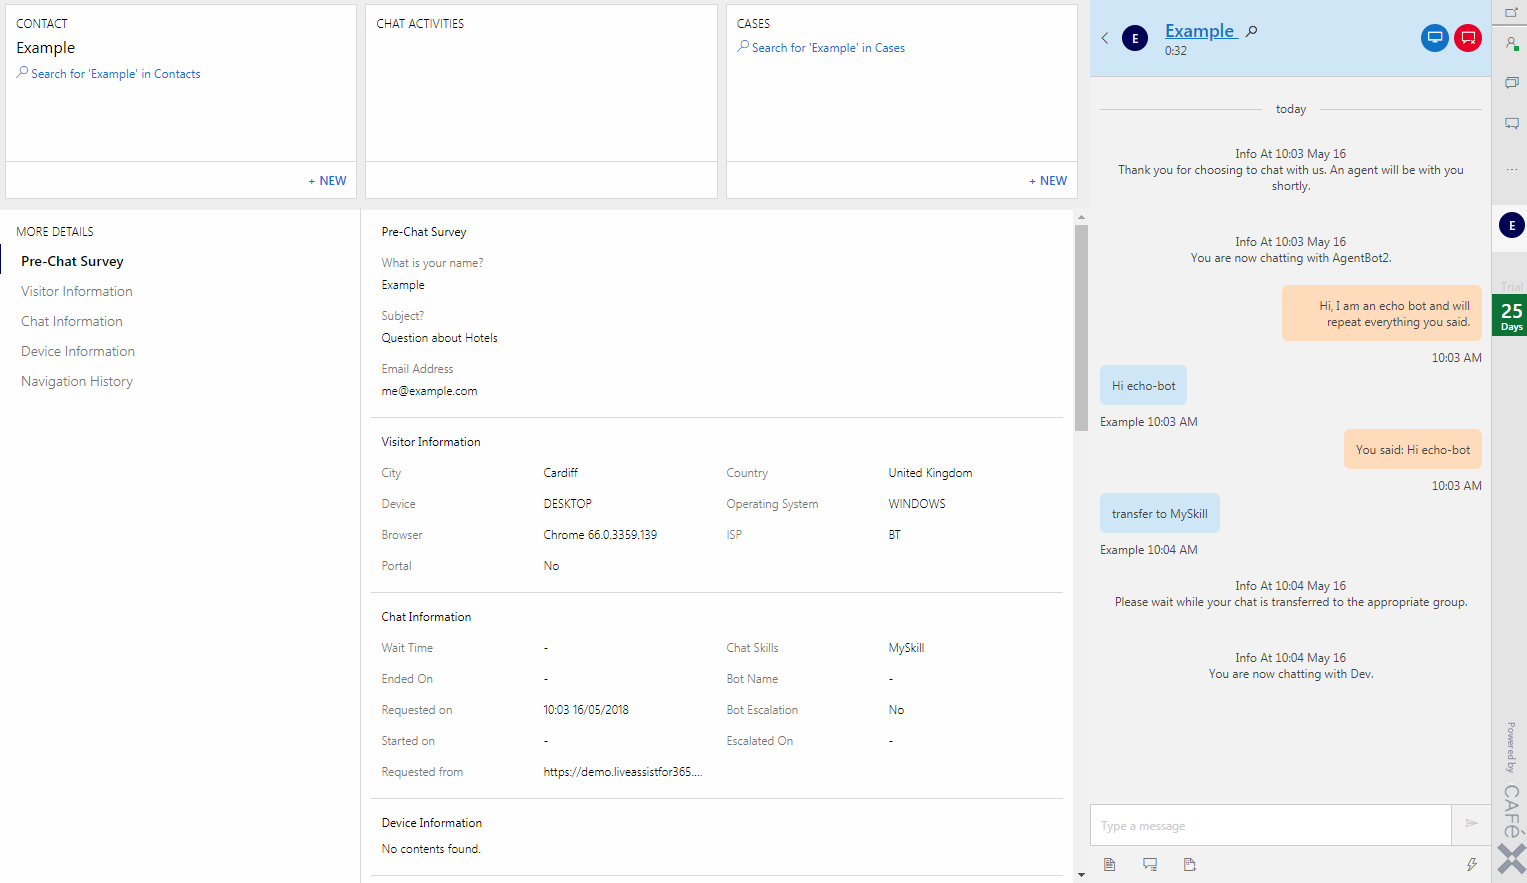
Pre-Chat Survey
If your engagement has a pre-chat survey, the information collected will be available to an agent in the Chat Activity after the bot has transfered the chat.
Post-chat Survey
Information collected on a post-chat survey is added to the Chat Activity

The transcript clearly labels the bot, agent and visitor, as well as other Information.